
Recently, I had an unfortunate incident where my G1 Roadbuster's
arm broke off. Initially, one may think that was is a result of
mishandling the figure. However, anyone who knows me well enough would
know that I tend to handle my Transformers very carefully, especially my G1 and
Masterpiece figures. This is mainly due to the cost of replacing a part
that may break, as either line can be pretty expensive for repairs.
As such, I posted a want ad in a group I help administrate on Facebook, the G1 Transformers Buying Trading Selling group. A member there, Andrew Zamarripa, messaged me with a generous offer to help. After chatting a bit to make proper arrangements, I happily sent payment.
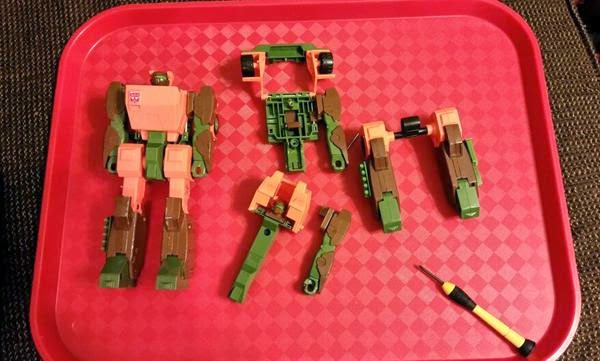
Fast forward just a bit, as I got the box with Roadbuster from Andrew for repairs. With the spare
in hand, I was able to perform an arm transplant. It's a pretty simple operation, as there's a screw on the front and a screw on the back. Simply removing both separates the abdomen portion from the back, exposing the pins which hold the arms. The pins aren't beveled, so just a little finagling will slide the pin up just enough to grip. I've used a pair of needle-nose pliers on this in the past, but it's not required; I removed the pin with just my fingers this time around. As it
would turn out, I'm going to have to swap the hoods out too, as mine has a
small chip from where I transformed it so much as a kid.
(Roadbuster, it's what's for dinner!)
Once the pin is out, the arm will be separated from the rest of the body as a result, as seen below:


(Believe it or not, but this is the broken arm!)
After the arm is separated, the screw holding the armor on the arm needs to be removed to access the joint. The armor then just slides off:

There is only one screw holding the arm to the rotatory joint. There is also a ratchet under the spring, as the joint is also tension-mounted, The part that broke on mine is the screw housing that the holds the screw in the joint:

You'll see that I'd attempted repairs, as the blue masking tape is holding the crumbles of what's left of the housing. This section of the arm crumbled inside (similar to the same effect that GPS has, but this was probably due to the tension of the screw, among other things). I had already attempted a super-glue repair, but due to the location of the damage, the portion is always under a bit of strain. Super-glue is great for other repairs and some other custom things, but super-glue rarely works on these sorts of things under such tension. Don't get me wrong, this thing isn't heavily torqued or anything, but this isn't just on a joint - it's the housing for the screw itself!
So, to perform the repair, I simply had to remove the arm from the spare and exchange the arms. I only photographed the disassembly for reference and to show the damage just a bit. Though it's pretty easy, I figured there'd be some who might be interested in this sort of thing.
When I first got back into collecting, Roadbuster
needed the same arm repaired. My Botcon 2001 trip gave me the part I
needed, as I'd bought a junker bot for $5 there. This repair takes me in
a bit of a circle, but I still remember being upset as a kid when I broke it. So, Roadbuster is on his way to recovery . . . a second time!

(Can you tell which one is now missing an arm?)
Thanks again to Andrew Zamarripa for his help here!
Awesome, glad you got it repaired!
ReplyDelete